Your Onboarding Specialist will contact MoE and get your Service connected.
Once this action is complete:
Searching for NsNs
You will not be able to search for a child's NsN until your service is connected to the Ministry.
Once connected:
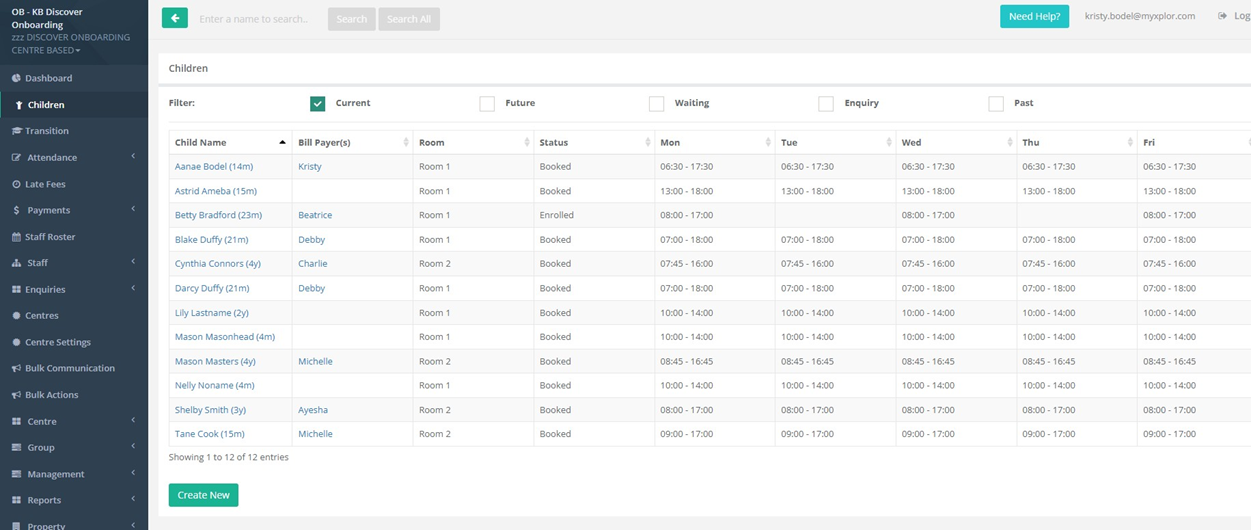
1. Go to the Child Menu
2. Click on the Child Name
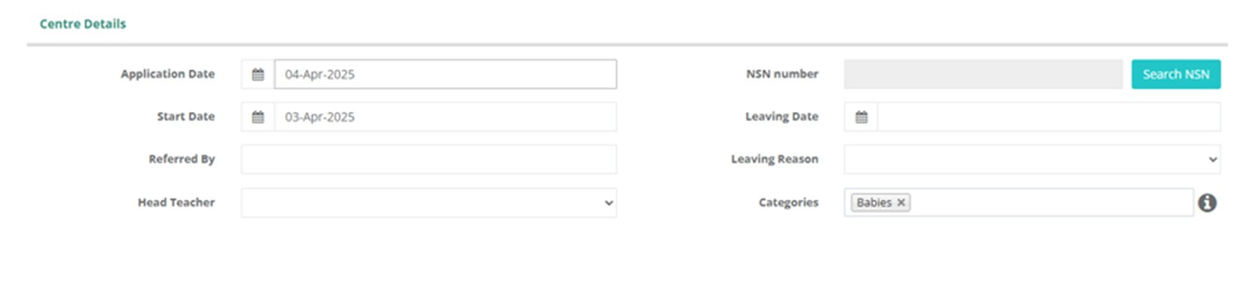
3. Scroll down to Centre Details
4. Click on Search NsN
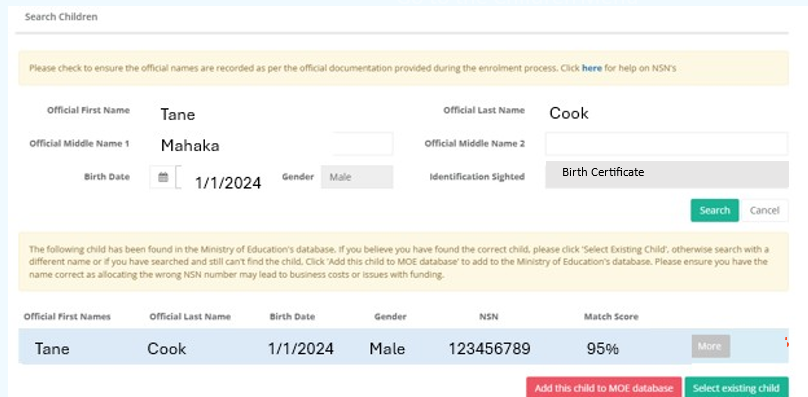
5. Is this the child at your Service, click on Select Existing Child / If not you can click Add this Child to MoE Database
6. Click on Save
Running Invoices for Families for the First Time
If you are using Discover for the Homebased Payments Educator Report you will need to run Invoices for the Report to populate. Even if the invoice is $0.
If you have had a Data Migration we can import your Balances from your previous software
Balances will be imported by your Onboarding Specialist if this something you requested.
Make sure you have sent your balances to your Onboarding Specialist.
Once Imported your Onboarding Specialist will cross check your
Balance Report with Discover to make sure they have all Imported accurately.
Applying Parent Payments
Manual via Account Screen: see here
Bank File Upload: see here
Xero: see here
Xplor Pay via Debit Success: see here
WINZ Payments: Automation Setup or Manual Entry
Discounts/Charge Adjustments/Equity Funding, see here: Discounts, Charge Adjustments, Equity
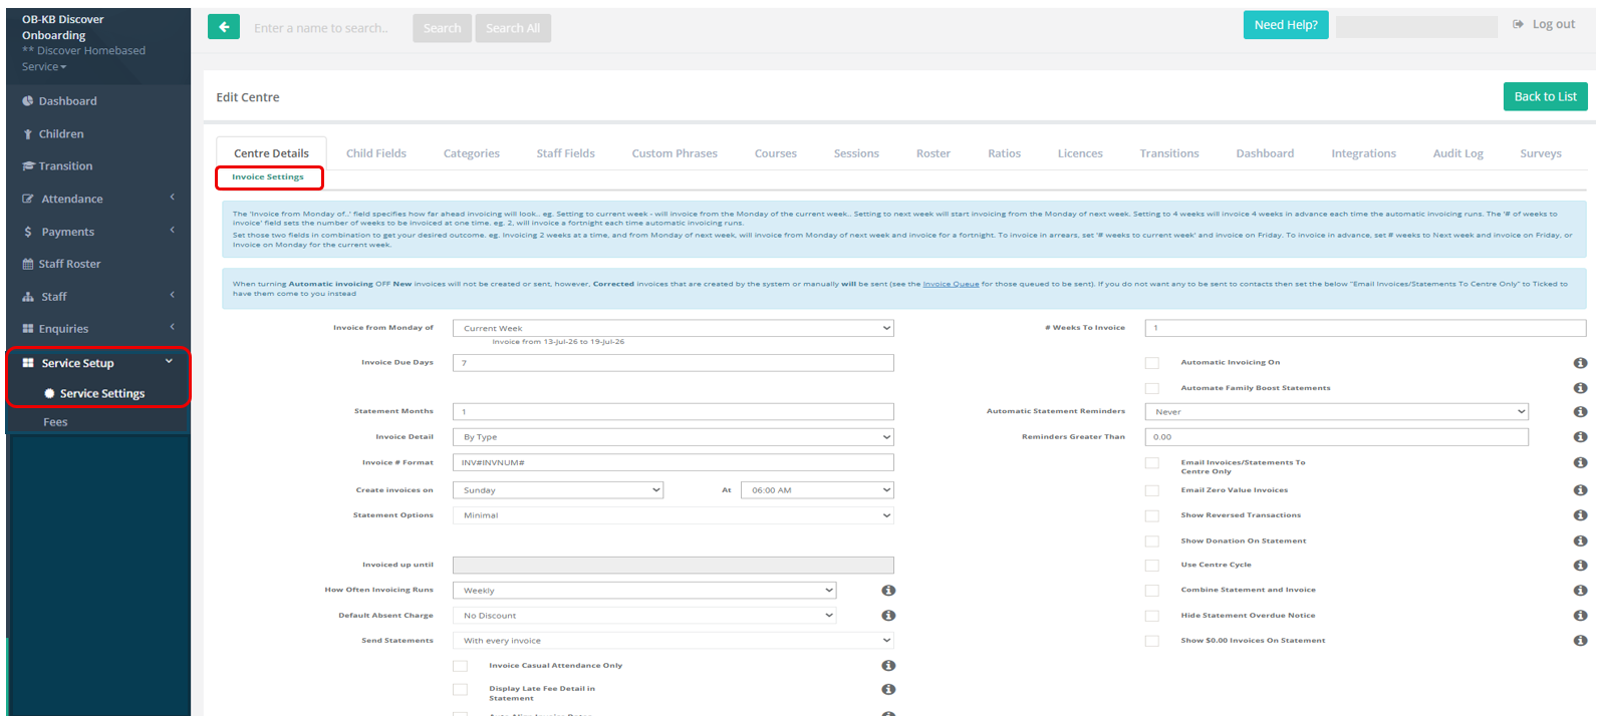
Check your Invoicing Settings
Go to Service Settings → Scroll down to Invoice Settings.
Key settings:
Invoice from Monday of: Choose ‘Previous Week’ (recommended) or future weeks for advance billing.
# of Weeks to Invoice: Defines invoice period (e.g., 1 = 1 week).
Create Invoices On/At: Set day/time for auto generation.
Tip: Set the day and time to match when you usually send invoices.
For example: If set to Monday 7am but you generate invoices at 10am, the system may treat them as part of the next cycle. If Automated Invoicing is on, it will generate the invoices at Monday 7amHow Often: Weekly by default; adjust to your cycle or daily.
Email Invoices/Statements to Centre Only: Tick for first run (can toggle later).
Invoiced up until: Shows how far you've invoiced.
First Invoice Run – Email to Service/Centre Only:
1. Centre Settings → Invoice Settings
Tick “Email Invoices/Statements to Centre Only”
Save
2. Go to Bulk Actions → Enrolment Invoices
Set Children Enrolled Between dates
Filter/select children
Click Send Now → Create Enrolment Invoices
3. All invoices will go to the Centre Email. Review them for accuracy.
Email Invoices to families:
1. Centre Settings → Invoice Settings
Untick “Email Invoices/Statements to Centre Only”
Save
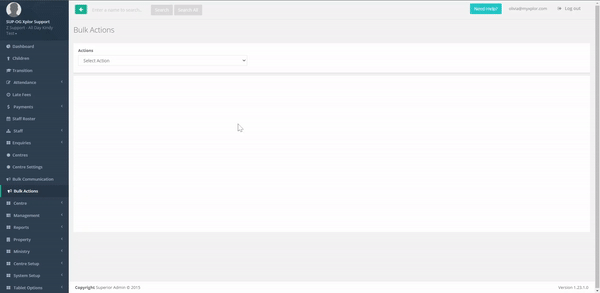
2. Bulk Actions → Resend Invoices
Choose date before invoice creation
Click Resend
Turn on Automated Invoicing:
Centre Settings → Invoice Settings
Tick “Automate Invoicing On”
Invoices will run automatically based on your day/time settings.
Save
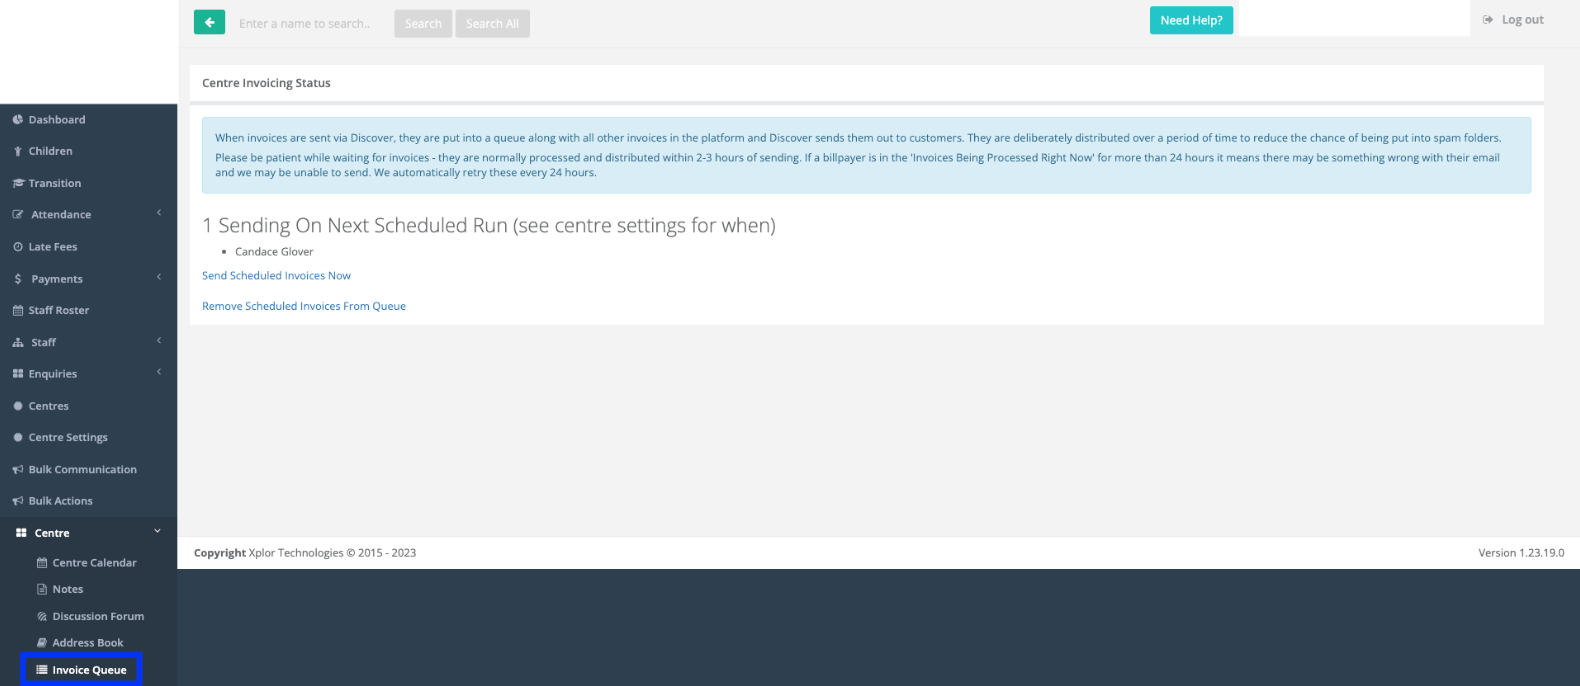
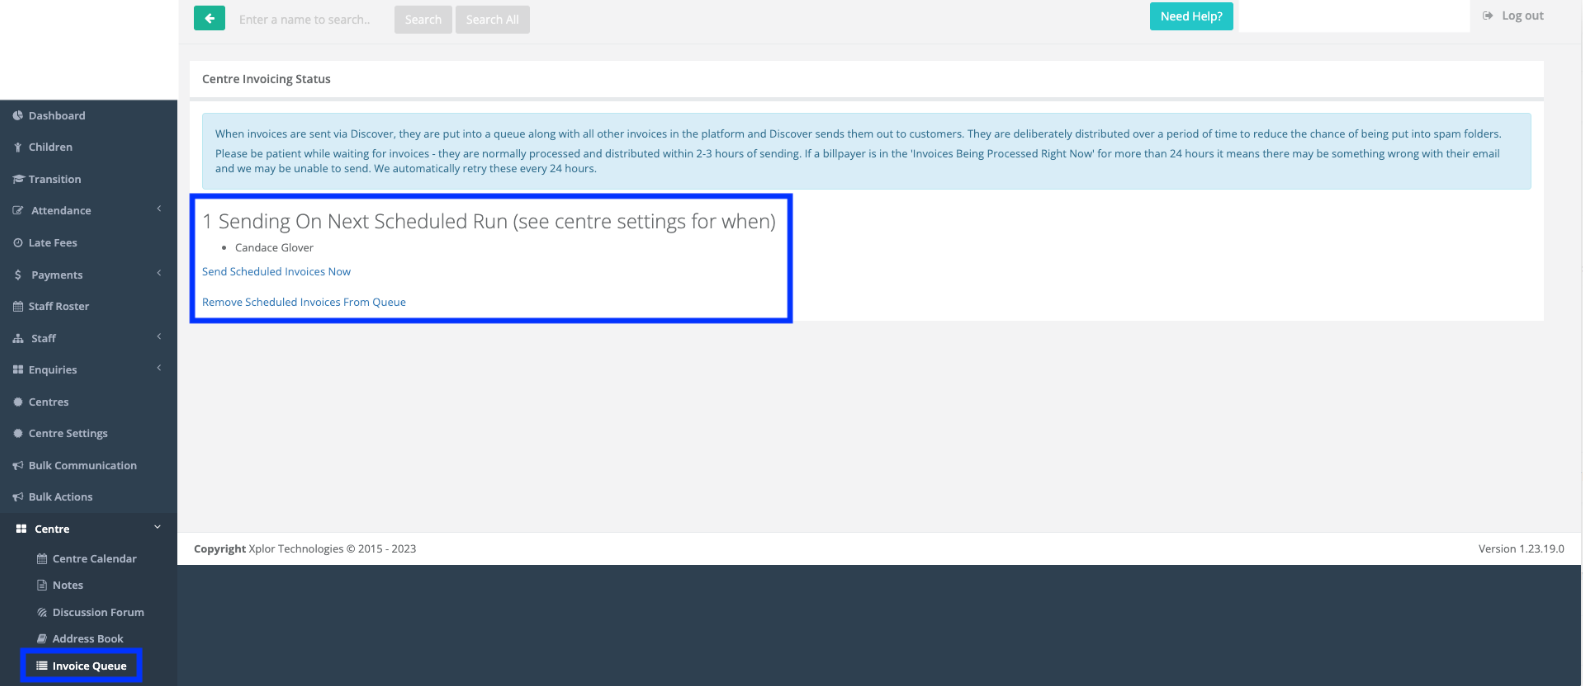
Administrators are able to see which invoices are included in the next schedule run. They are also able to
- Send Scheduled Invoices Now - they will take 30mins - 2 hours to generate so they are not marked as Spam
- Remove Scheduled Invoices From Queue
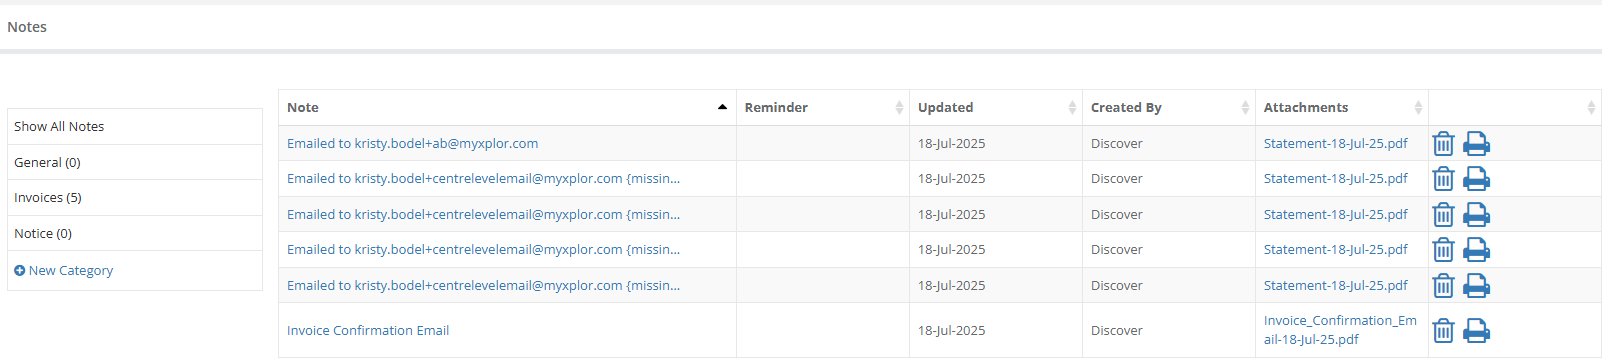
To check if Invoices have been sent from Discover:
- Go to Centre > Notes:
Invoice Confirmation Emails = summary sent to centre
Individual Statement Emails = sent to parents
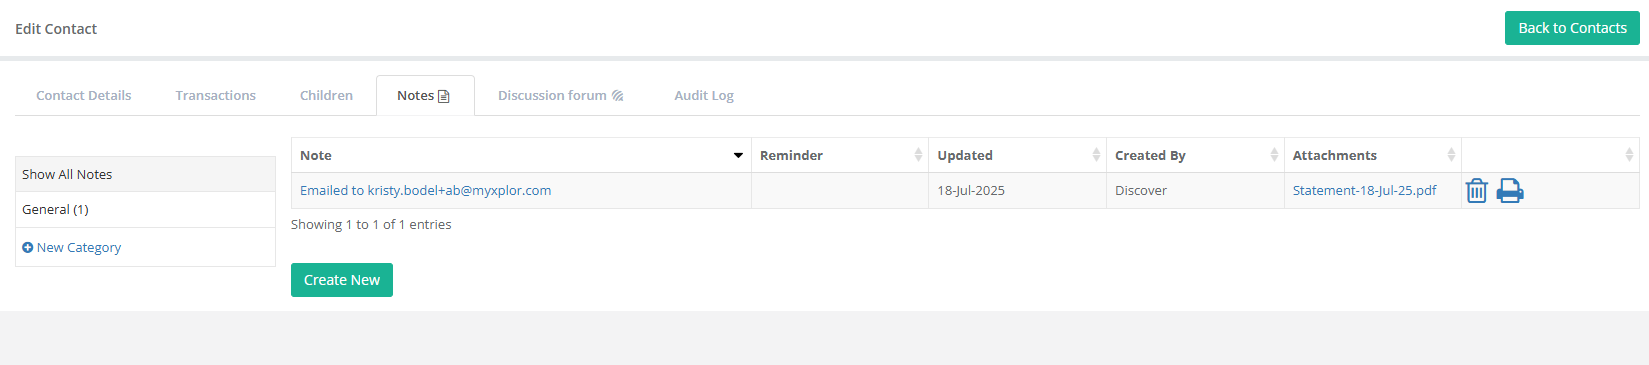
Check Per Billpayer:
Go to Children > Billpayer > Notes Tab
View emails/statements sent
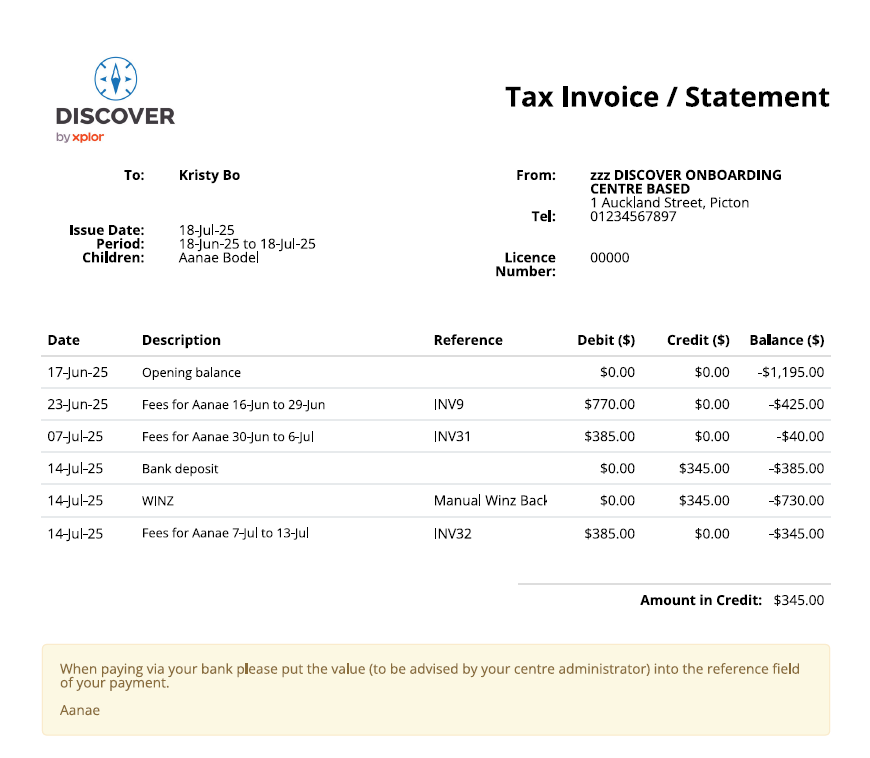
Once you have run invoices/statements:
To preview the Invoice/Statement:
Go to Children > Child Name > Account Tab
Create Invoice → Enrolment Invoice → Set Dates
Click Invoice > Print PDF
Click Show Statement = Full account activity (last 30 days)
To Change Settings:
Go back to Centre Settings > Invoice Settings
Was this article helpful?
That’s Great!
Thank you for your feedback
Sorry! We couldn't be helpful
Thank you for your feedback
Feedback sent
We appreciate your effort and will try to fix the article