
Create an enrolment to record the child’s regular booking days, times, fees and room allocation. This article explains how to create a child’s first enrolment and ensure all required details are entered correctly.
- Creating a Child’s First Enrolment
- Updating an Existing Enrolment
- Ending a Child’s Enrolment
- Re-Enroll a Child

Updating an Existing Enrolment
To update a child’s existing enrolment:
- Navigate to Children and select the child’s profile.
- Open the Enrolments tab.
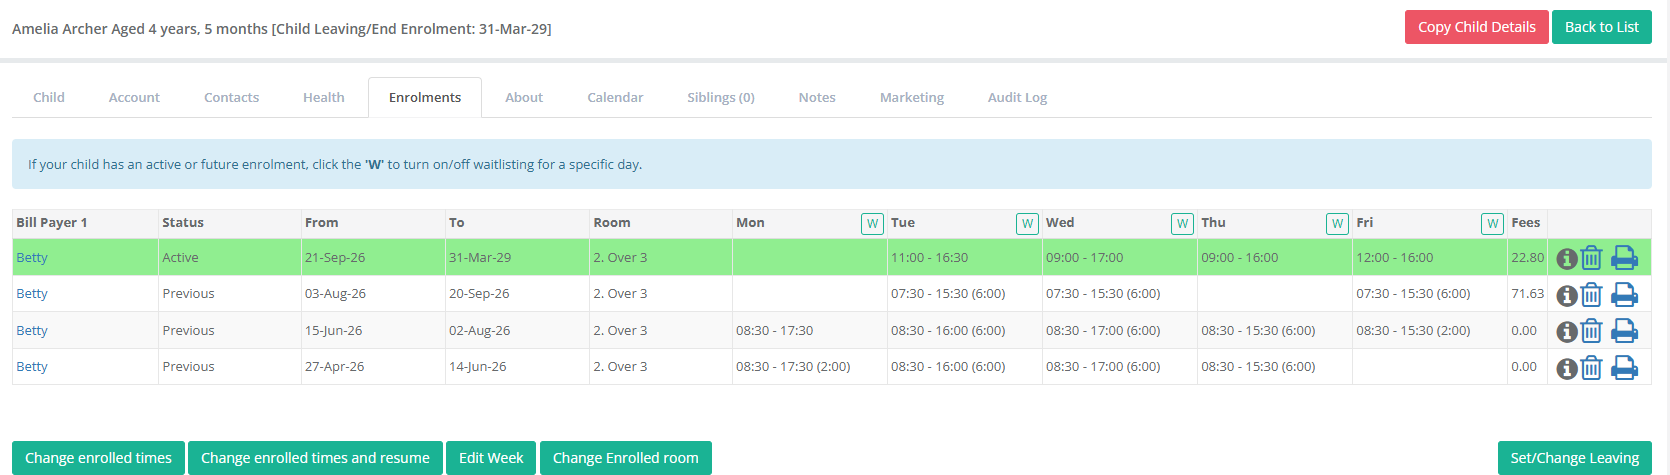
- Review the child’s current enrolment, displayed in green with the status Active.
- Select the option that matches the change you need to make:
- Change Enrolled Times
Update the child’s regular booking days or times from a selected effective date. - Change Enrolled Times and Resume
Make a temporary change before resuming the child’s existing schedule. - Edit Week
Update the child’s bookings for a specific week only. - Change Enrolled Room – Move the child to a different room without changing their booking schedule.
- Change Enrolled Times
- Enter the effective date and update the required enrolment details.
- Check that the booking times, fees, rooms and enrolment status are correct.
- Select Save.
The updated enrolment will appear as Active, and the earlier enrolment will remain visible as Previous.
Ending a Child’s Enrolment
When a child is leaving the service, add a leaving date to their profile:
Navigate to Children and select the child’s profile.
Open the Child tab.
Scroll to the Centre Details section.
Enter the child’s final date at the service in Leaving Date.
Select the appropriate option from the Leaving Reason dropdown.
Select Save.

Discover will automatically update the child’s records, including their enrolments, using the selected leaving date.
If the child’s latest enrolment is later extended beyond the existing leaving date, the Leaving Date will automatically update to match the enrolment’s final day.
Re-Enroll a Child
Use this option when a child has previously left the service and is returning.
1. Navigate to Children and select the child’s profile.
2. Open the Enrolments tab.
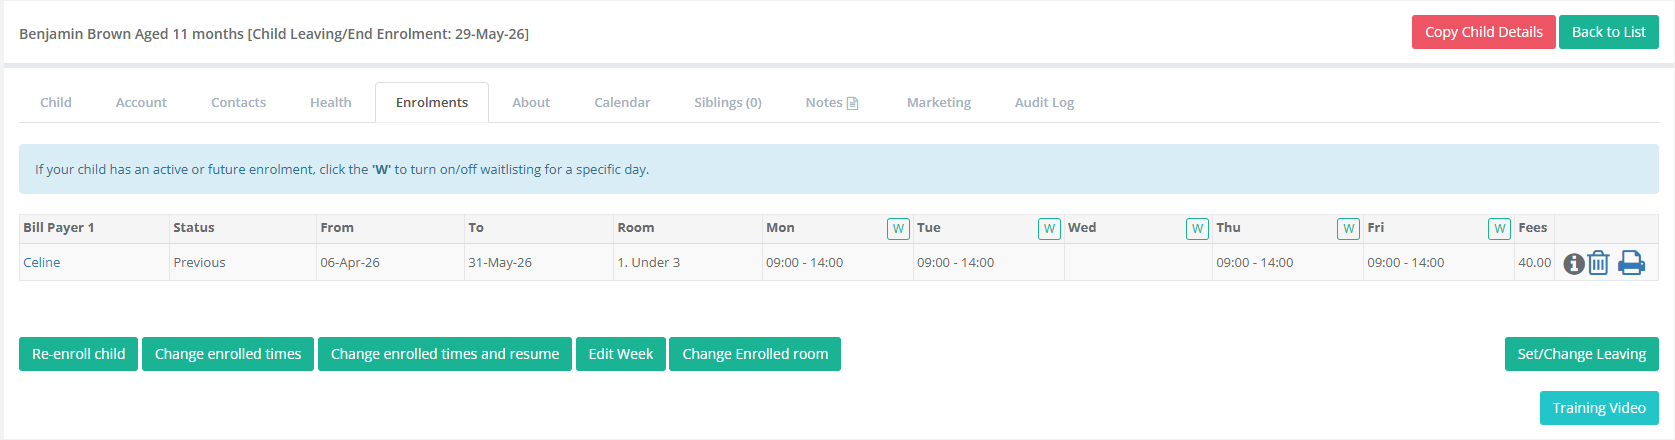
3. Select Re-enroll child.
4. In Effective From, enter the Monday date when the child’s new enrolment will begin.
5. In Effective Until, select the appropriate end date or choose Until Child Turns 5.
6. For each day the child will attend, enter the:
- Booking Start Time
- Booking End Time
- Fee
- Room
7. Set the enrolment Status to Accepted.
8. Review the enrolment details and select Save.
The child’s new enrolment will appear as Active, while their earlier enrolment will remain visible as Previous.
Was this article helpful?
That’s Great!
Thank you for your feedback
Sorry! We couldn't be helpful
Thank you for your feedback
Feedback sent
We appreciate your effort and will try to fix the article