Discover has many helpful features to optimise your centre administration.
TABLE OF CONTENTS
- Getting a New Child started at your Centre
- Marking Attendances
- Invoicing
- Adding Parent/Guardian Payments
- Rostering
Getting a New Child started at your Centre
Step 1: Option 1 - Using the online enrolment form
Centre Set-up > Setup Widgets > Enroll at this Centre.


This link can be sent to your families via a simple email, or embedded on your website if desired (instructions can be found in the Setup Widgets page, but this is not essential to use the form).
Once the family has completed the enrolment form, you will receive an alert on the Dashboard, under Child Alerts.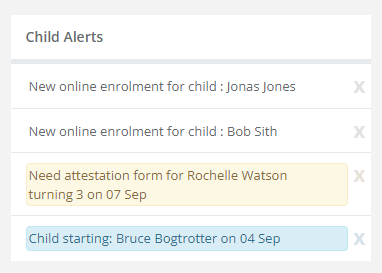
For more information on online enrolment forms, please see our article:
Enrolment Process in Discover
Step 1: Option 2 - Manually entering Child information
If you would prefer to enrol your children manually, you can find a copy of your enrolment form in Reports > Children Reports > Blank Enrolment Form.
Once the parent/guardian has completed the form, navigate to the left-side menu > Children > click the Create New button at the bottom right of the screen.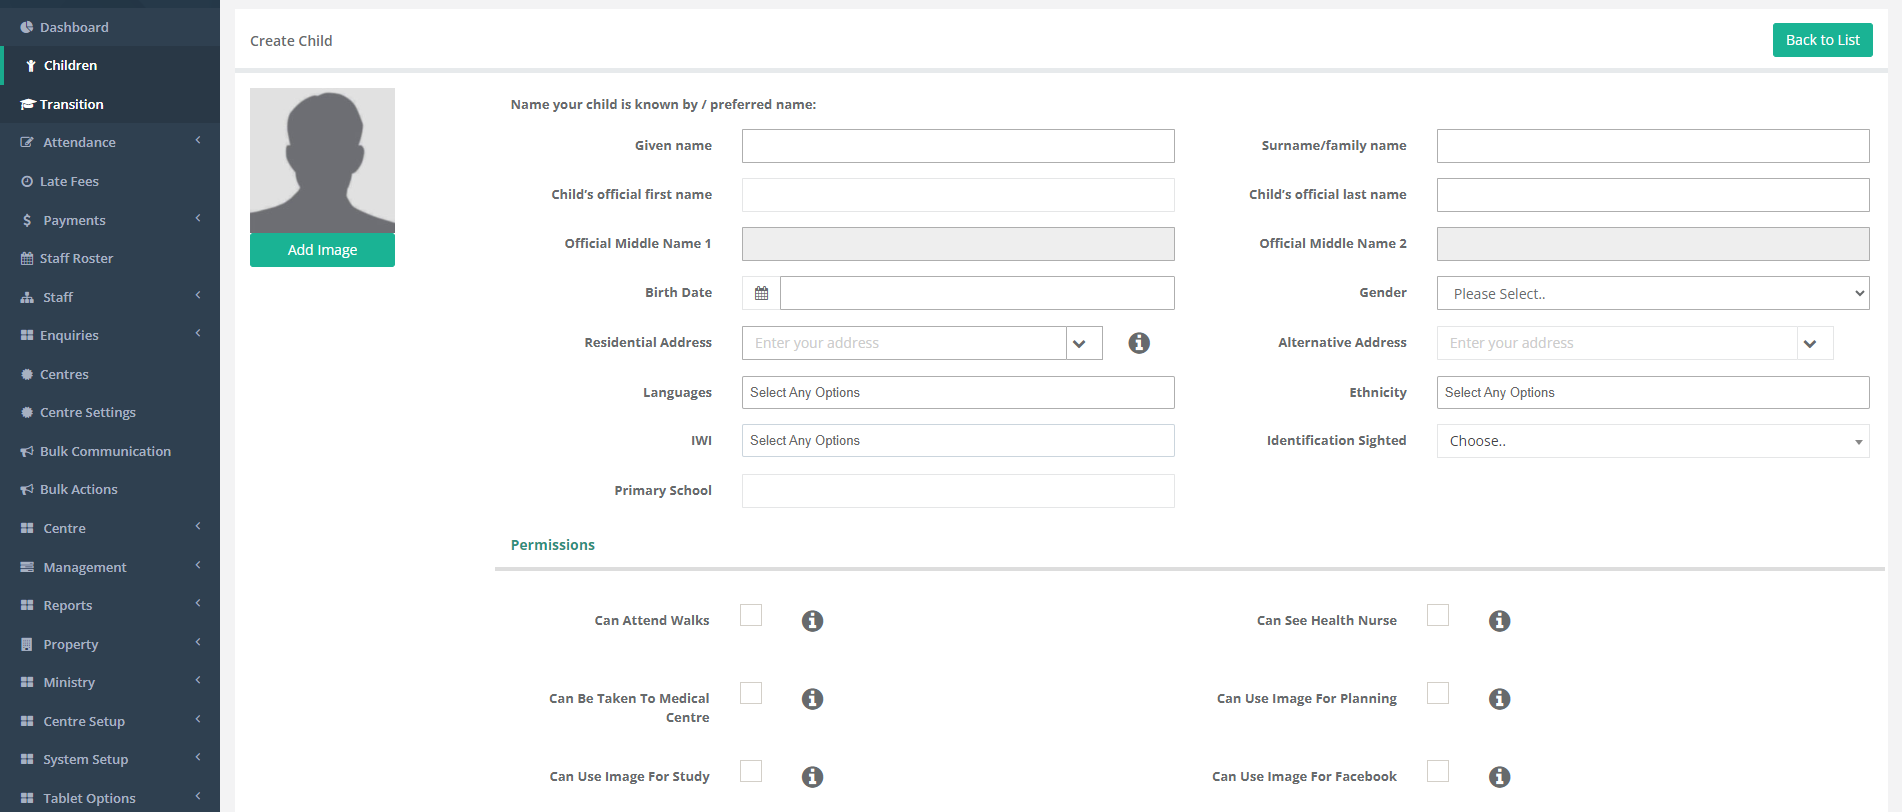


Step 2: Creating a Booking/Enrolment
To create a booking for a child, in their profile, navigate to the 'Enrolments' tab and click the 'Create Enrolment' button.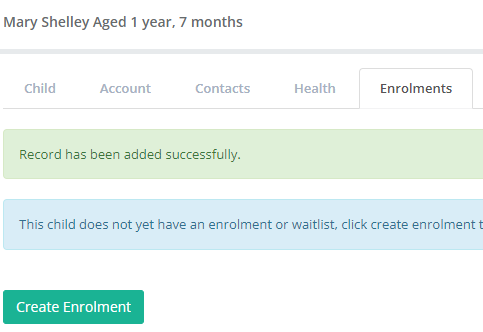
1) Enter the booking start date in the Effective From field and check/adjust the date in the Effective To date field.
2) Check the Status dropdown has 'Accepted' selected.
3) Type in the booking start and end times in the From and To fields in the weekly table.
4) Select the Enrolment Type under the dropdown for each day, then select your Room and Fees (if these are greyed out, it means there is only one option for the child given their age).
5) Select the bill payer and click 'Save'
6) Discover will ask you if you would like to print the Attestation form - confirm your choice.
7) Done!
For further information on Bookings/Enrolments, please see our article here:
Child Enrolments in Discover
Marking Attendances
Child attendances can be marked on paper and entered manually in to Discover, or the Discover tablet can be used. If you would like to save time, the tablet is recommended, as this communicates with the Attendances screen and cuts down on admin time.
Option 1 - Tablet
If you have not set up your tablet, instructions can be found here.
Families can sign their children in and out, but attendances can be recorded by Teachers as below:
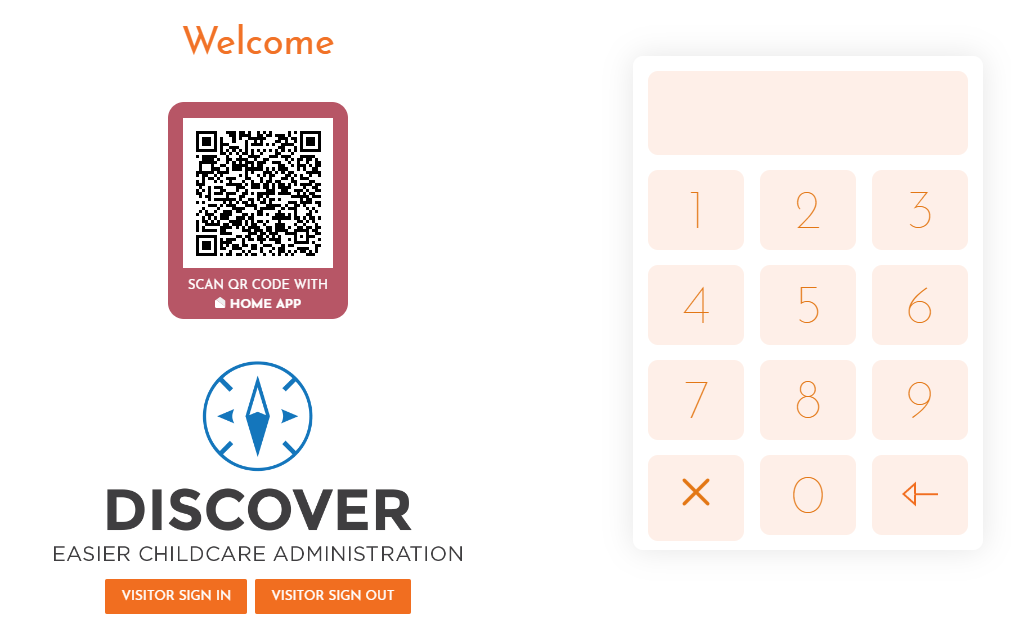
1) With the main tablet screen open, enter your pin.
2) Use the toggle under the 'Child Present' column to indicate whether the child is attending (right = attending, left = absent).

3) If absent, you may leave a comment and tap 'Ok'. If present, adjust the time if needed and tap 'Record'.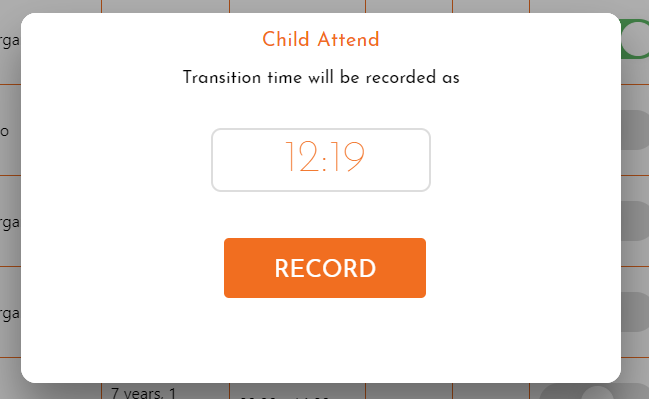

4) Done!
Option 2 - Manual Entry
2) Set you preferences in the fields, click 'Get Report'.

3) Click 'Print' or 'Export to PDF' to print.


6) Type in the From and To times for each child who attended.
7) Use the dropdown under 'Status' to indicate if the child was absent or on holiday.
8) Use the dropdowns under the Funding and Discount columns if necessary.
9) Click 'Add Child' and enter their booking information if needed.
10) Click 'Save'.
Invoicing
Your Invoicing cycle settings (advance vs arrears, # of weeks invoiced etc) are set up for you during Onboarding, and from here, sending invoices to your families can be completed manually, or sent automatically by Discover.
Option 1: Automatic
To switch on Automatic invoicing, navigate to your left-side menu > Centre Settings > Centre Details tab > Invoice settings.
Tick 'Automatic Invoicing', scroll to the bottom of the page and click 'Save'.
Your invoices will be sent automatically by Discover on the day listed next to 'Create Invoices on'.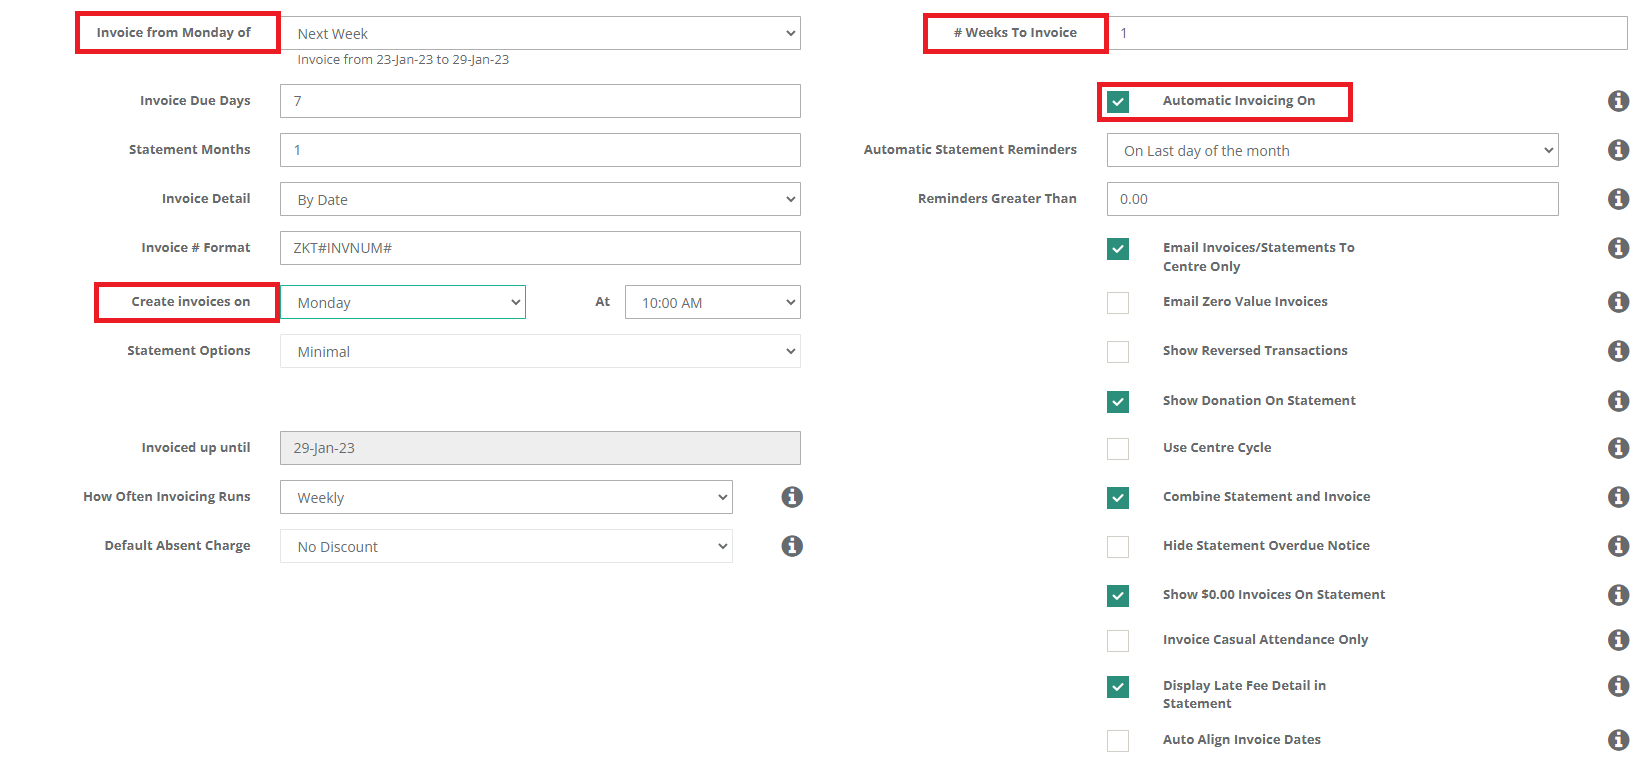
For more information on automatic Invoicing, please see our article Invoicing Master Guide
Option 2: Manual
1) Enter the dates you would like reflected in the invoice next to 'Children Enrolled Between'.
2) Filtering options allow you to refine by the status of the child and/or their room.
3) Clicking >> will select all children to invoice, or alternatively, clicking on the name of the child, then '>' will allow you to select individual children.
4) Specify whether you would like to send the emails now, or delay.
5) Click 'Create Enrolment Invoices'.

Note: If you are using automatic invoicing, creating a manual invoice will increase the balance of the next automatic invoice. For this reason we do not recommend using the two methods in conjunction.
For information on Resending Invoices, Previewing Invoices and more, please see our article: Invoicing Master Guide.
Adding Parent/Guardian Payments
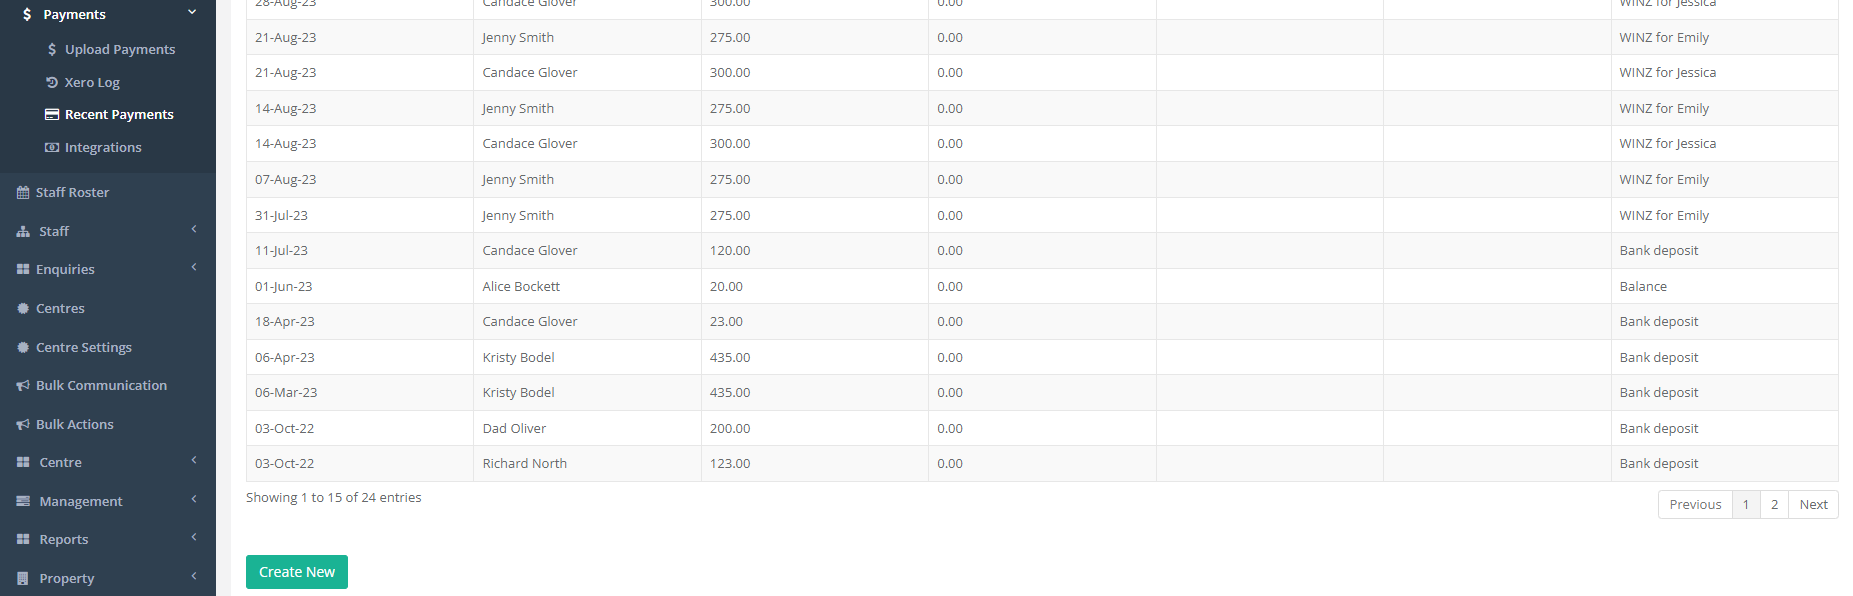
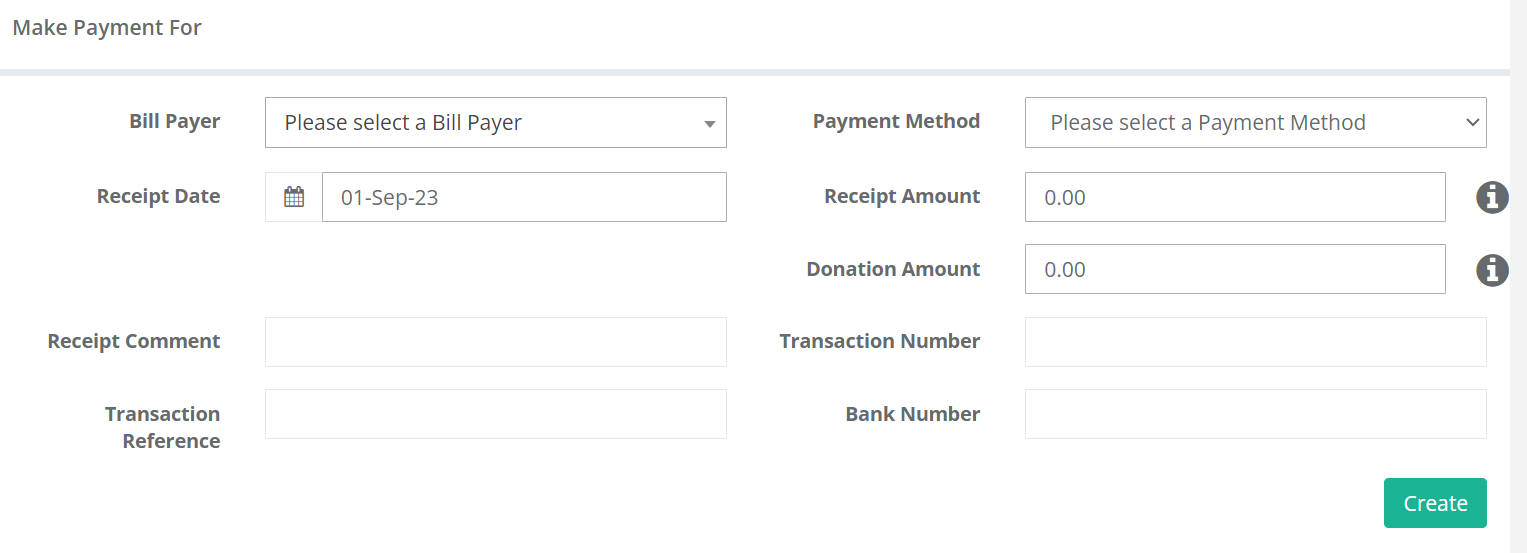
Enter the details of the payment and click 'Create'.
Payments from Families can also be uploaded in bulk via spreadsheet or Xero.
Please see the guides below if needed:
Rostering
There are quite a few ways to use your roster in Discover (please see our article: Rostering Master Guide) but the steps below are an easy place to start.
Step 1: Creating your shift types/tasks

Note: This is only necessary if you are creating a new type of shift or if the roster has never been set up.
2) Select 'Create New' at the bottom left of the screen.
3) Enter the name of the shift type/task in the 'Function Name' field, and create a code for 'Function Code'.
4) Next to 'Colour', type in the name of a colour, or click the colour icon to the right to choose from a palette.
5) Tick the boxes to specify the details of the shift type/task.
6) If shift is specified as 'Teaching', an option to select a room will be displayed.
7) Type in your Payroll codes if needed.
8) Click 'Save'.

Step 2: Creating a Roster
2) The roster will show all dates in the current week, but will be set to the current date. Select another date within the week, or if necessary, click the calendar to select a date further ahead.
3) Locate the cell corresponding to your staff member, and the time they will begin their shift.
4) Click the drop-down arrow in this cell and select a shift type from the list.
5) If you need to change the shift type throughout the day(for breaks, non-contact time etc), click the drop down next to the time of the change, and select an alternative.
6) To end a shift, select the blank option from the dropdown at the time the shift is due to end.
If a staff member does not appear in the roster, click the green Person+ sign at the top of the sheet.
Step 3: Sending the Roster
1) At the top of your Roster screen, click the 'Reports' tab.
2) Select 'Email Staff Rosters'

3) Enter your dates and click 'Get Report'.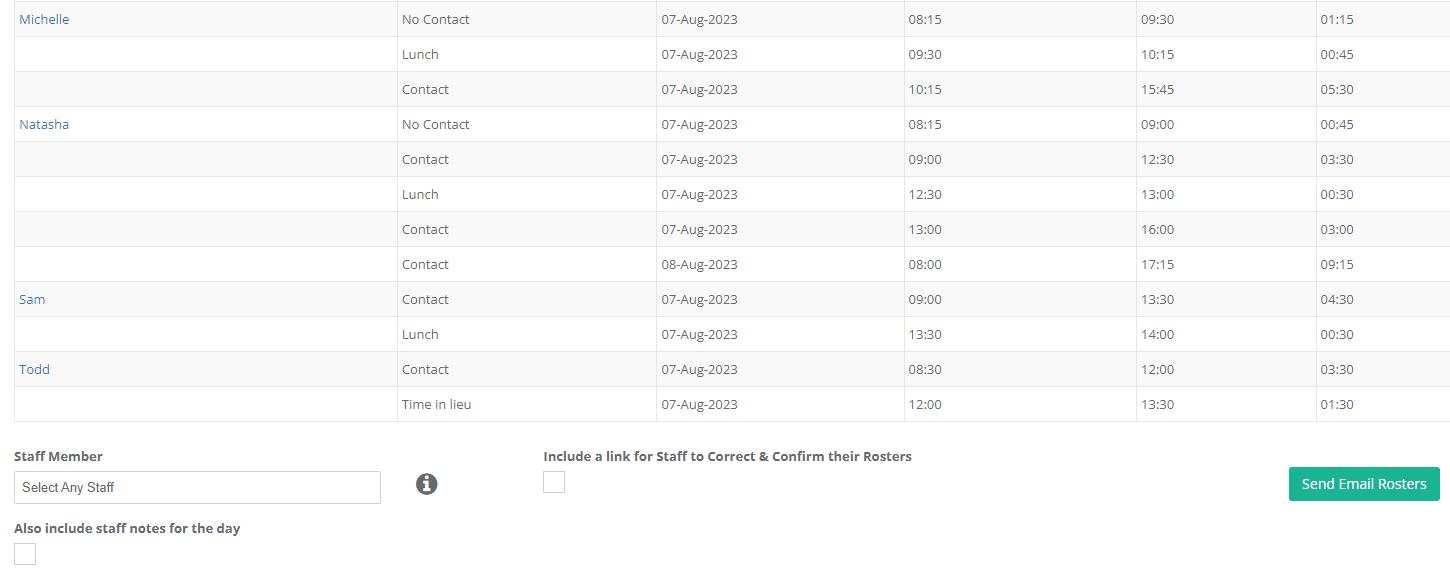
4) Under Staff Member, select the Teachers/Staff you would like to send the Roster to.
5) Click 'Send Email Rosters'
Was this article helpful?
That’s Great!
Thank you for your feedback
Sorry! We couldn't be helpful
Thank you for your feedback
Feedback sent
We appreciate your effort and will try to fix the article