When setting up Automated WINZ Receipts
- Navigate to Centre Setup Menu
- Select Centre Settings
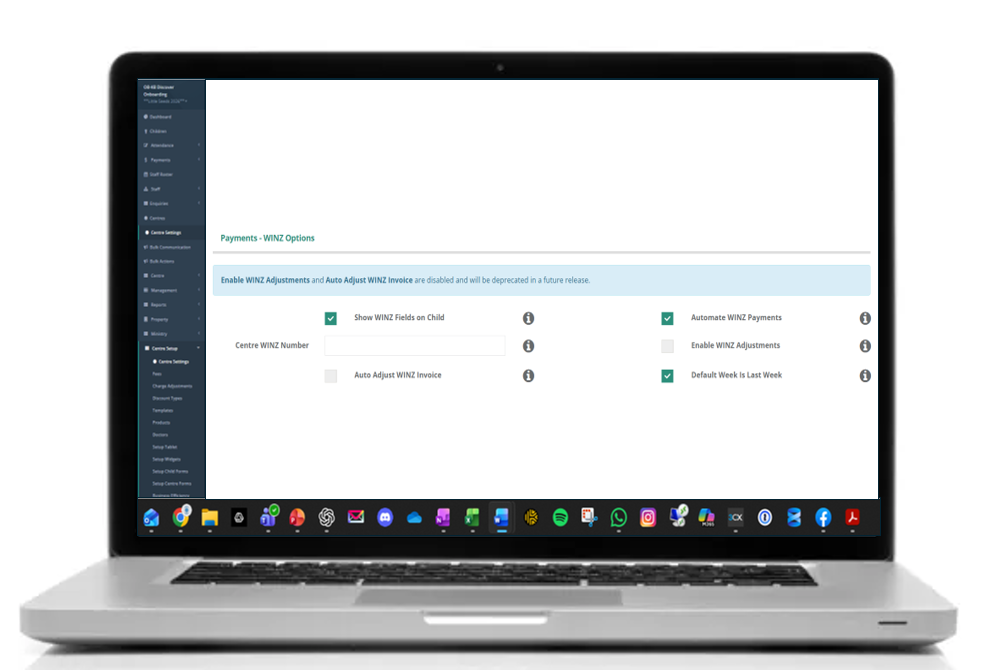
- Scroll down to Payments - WINZ Options
Please note: This is not connected to your Bank Account or the WINZ Statement your receive. Any changes in WINZ Payments must be manually actioned.
- Select the relevant WINZ options:
- Show WINZ Fields on Child - enables this functionality within the Child Details Screen.
- Automate WINZ Payments - automatically assigns payments make by WINZ to the selected account.
- Default Week Is Last Week - when enabled, the default week for the WINZ payments report will be the previous one.
- Auto Adjust WINZ Invoice - when enabled, if the invoice in any given week is less than the WINZ amount on the child account, an extra invoice line item will be created with the difference.**
- Enable WINZ Adjustments - if enabled, Invoicing will adjust holiday credits relative to WINZ payments.**
** Auto Adjust WINZ Invoice and Enable WINZ Adjustments can no longer be switched on or off and will be depreciated in a future release. If either of these settings were enabled for your service, they will remain active until fully depreciated. Please contact support to deactivate these options.
- Scroll to the bottom
- Select Save
- Navigate to the Children Menu.
- Select the child profi
- le receiving WINZ.
- Scroll down to Work and Income (WINZ) or Study Link on the Child Profile.
- Select Create New.
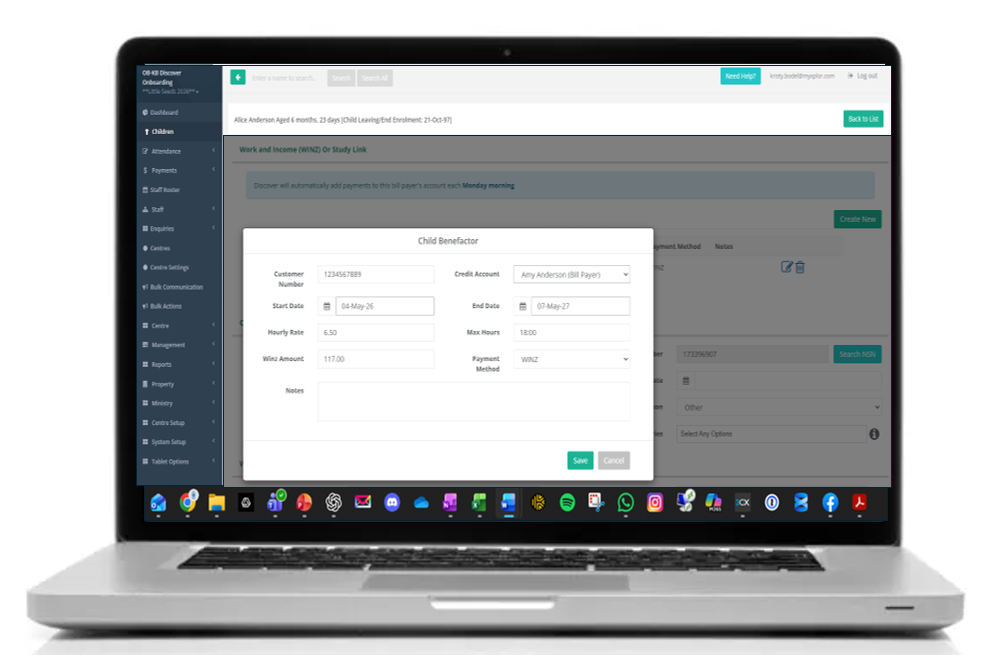
- Fill out the required information.
- Select Save
WINZ payments will begin to receipt the next week for the previous week. For example, if Automated WINZ was enabled 15-MAY-26, auto receipting triggers for week of 11-MAY-26
If Start Date is before the previous week, manual receipting of payments will need to be actioned within the Account Tab of this child before automation will successfully begin.
Manually receipting WINZ.
- Navigate Child Profile > Account > Make Payment.
- Within Payment Method, select WINZ.
- Enter the Receipt Amount.
- Enter a Reciept Comment and Transaction Comment if required.
- Select Create.
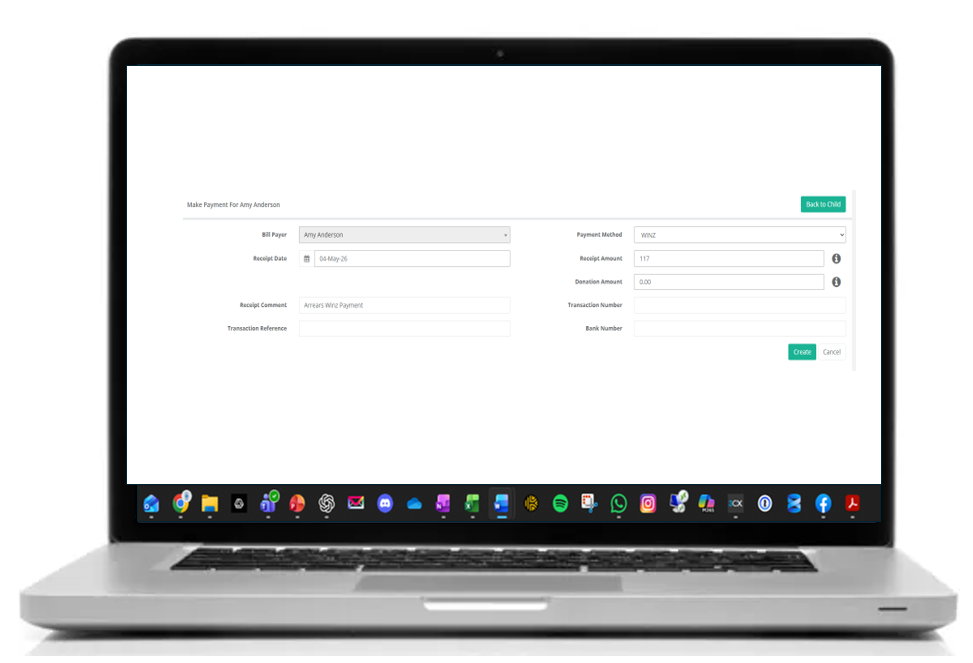
For example:
- The Centre Administrator created the Automated WINZ Entry on a child profile 15-MAY-26.
- Automated WINZ receipts will generate on the Account Tab from the following week, commencing 18-MAY-26.
- Payments are receipted every Monday, based on the original start date of 04-MAY-26.
- The child was entitled to one previous WINZ payment of $117 on the 04-MAY-26. This payment must be added manually via the Account tab, as automated entries do not backdate, regardless of the start date entered.
- The WINZ payment for the week of 11-MAY-26 will be automatically receipted 18-MAY-26.
If the amount paid changes for one week only: Delete the Automated Receipt in the Account Tab and create the correct amount manually following the above instructions.
If the amount paid changes for a whole future period: End the current period effective the day before the new period commences.
If the WINZ Payments Cease: Enter an end date to the automated receipting.
Was this article helpful?
That’s Great!
Thank you for your feedback
Sorry! We couldn't be helpful
Thank you for your feedback
Feedback sent
We appreciate your effort and will try to fix the article