Table of Contents
Step 1. Set your Default Billing Day for the Service
Set Default Billing Day:
Go to Payments> Integration > Payment Settings and choose your service’s default billing day.
For example: This shows that this service is billing weekly on a Friday Starting From the 22nd December 2025.

---------------------------------------------------------------------------------------------------
Step 2. Check the Billpayer Profiles
Go to Reports > Children > Contact Report
Select dates
Report fields: Email, Mobile, Address, DOB
“Which Contact”: select Billpayer
If any of the following is missing, you will need to collect the information and enter it, into the Billpayer Profile before continuing:
First & last name
Home address
Phone number (10 digits, no country code)
Date of birth
Email address
To update and enable Direct Debit:
Go to Children Menu → select Billpayer
Enter any missing details
Tick Pay by Direct Debit/Credit Card
Optional: set Payment Limit
Click Save
Optional: Select Billing Plan Tab (overrides default)
Billing Frequency
Select Weekly, Fortnightly or Monthly

Then once the Billing Frequency is selected, you can select a different Billing day, and the Monday of the Week you would like the automatic payments to start.
Then select Set Billing Plan

Custom Billing Day (alternative path):
Child Record > Contacts > Billpayer > Contact Details > Billpayer Details → Payment Plan
--------------------------------------------------------------------------
Step 3. Inviting Families
Your Payments Onboarding Specialist can send invitation emails to parents on your behalf during setup. If you choose not to send them at that time, you can easily send them later from the Active Bill Payers tab.
Customising the Billpayer Invitation Email
- Navigate to Centre/Service Set Up > Templates > Billpayer Missing Details.
- This is where you can customise the email that will be sent to parents from the Payments > Integration > Active Billpayer screen
- Once you’ve finished updating the template, click Save.
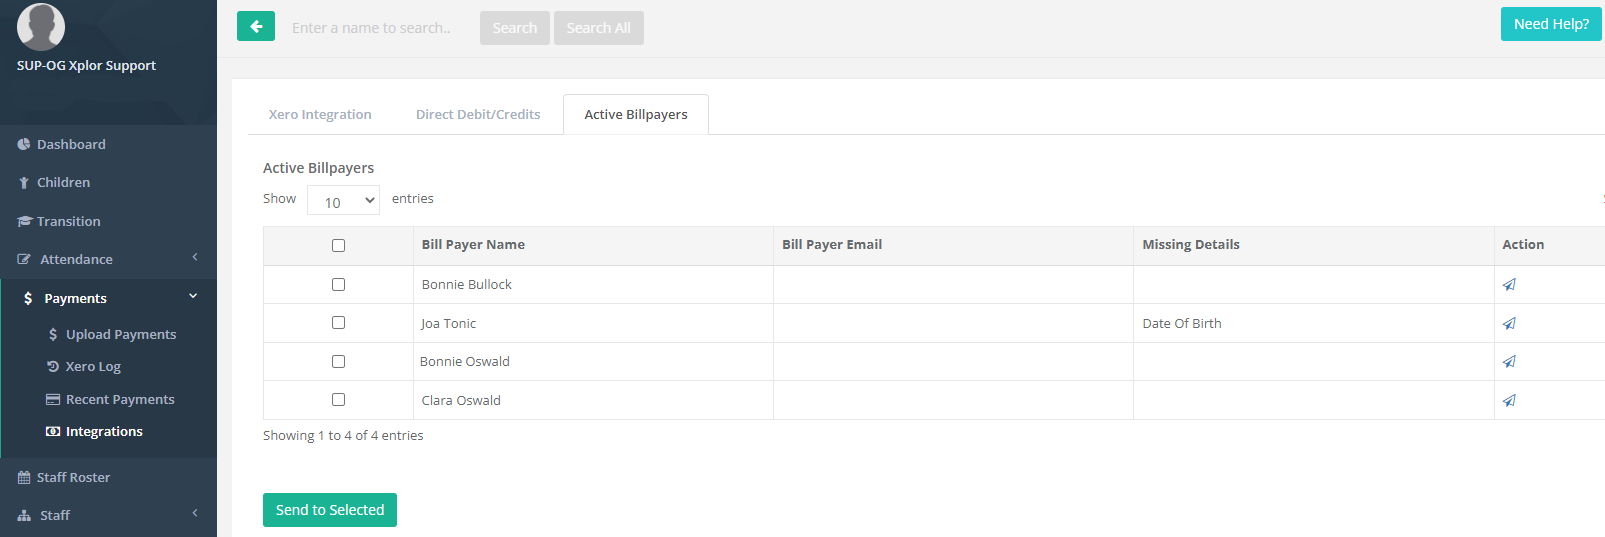
At the top of the list, tick Bill Payer Name to select all, or tick individual Bill Payers.
Click Send to Selected.
Sample Email from Discover:
This sends families a link to enter any missing details required to complete their Debitsuccess setup.
If needed, you can view instructions for:
Adding direct debit details on behalf of a family here
Sending Bill Payers a guide for entering details via Home here
Note: If a Bill Payer accepts Terms & Conditions but does not add bank/card details, a payment will attempt but fail. Both the service and the parent will be notified, and Pay by Direct Debit will be unticked in their profile.
Pay Now
Once your Debitsuccess agreement is signed and compliance is complete, your Payments Onboarding Specialist will enable Pay Now under Payments > Integrations.
Pay Now lets families make one-off payments via the Home app, separate from their usual billing cycle.
For more information, please see here.
Once Parents add in their Bank Account OR Credit Card Details, a payment will be picked up for the next week for the Selected day.
---------------------------------------------------------------------------------------------------
Was this article helpful?
That’s Great!
Thank you for your feedback
Sorry! We couldn't be helpful
Thank you for your feedback
Feedback sent
We appreciate your effort and will try to fix the article